An outdoor kitchen island is one of the most rewarding upgrades you can make to your backyard, and yes, you can build it yourself without draining your savings. Whether you're a weekend BBQ warrior or just crave more outdoor time with family and friends, having a functional space to prep, cook, and serve right on your patio takes entertaining to a whole new level.
Honestly, you don’t need a contractor, a second mortgage, or a truckload of stone veneer to make it happen. All you need is a plan, some basic tools, and a bit of sweat (as long as you don't mind losing any).
We’ll walk you through every step of the process, from choosing materials to integrating budget-friendly appliances. By the end, you’ll be flipping burgers and sipping iced tea next to your very own outdoor masterpiece. Let’s get fired up!
Why an Outdoor Kitchen Island Is a Game Changer
Summer is just around the corner, as I am sure you are aware, and that means burger and BBQ season are right there with it! This is the time when backyards are actually worth their price. But what's better than a backyard is a backyard with an epic kitchen island.
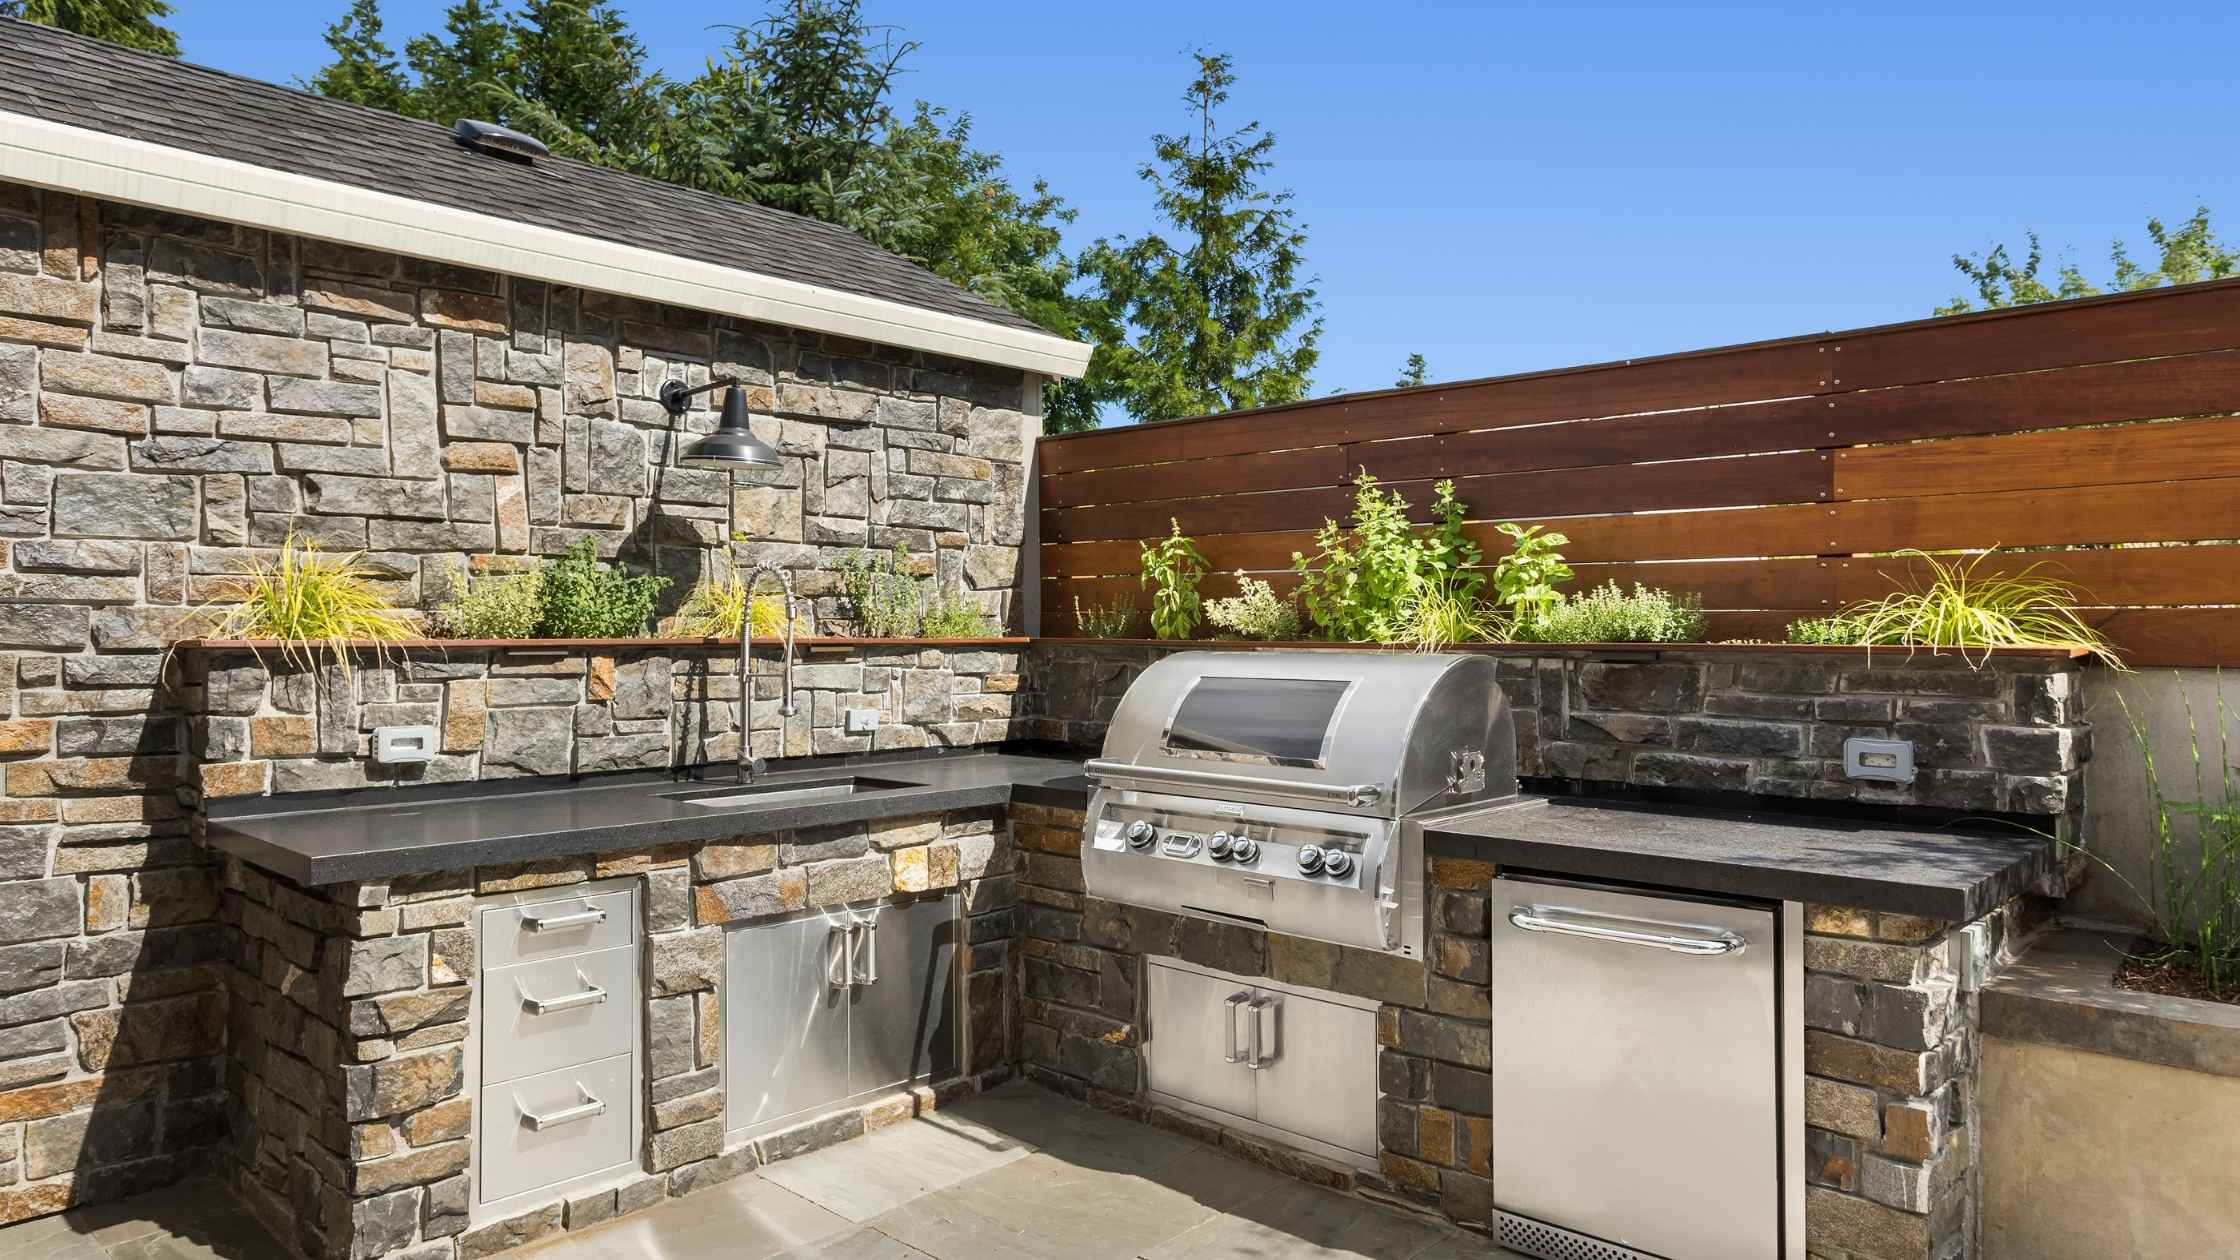
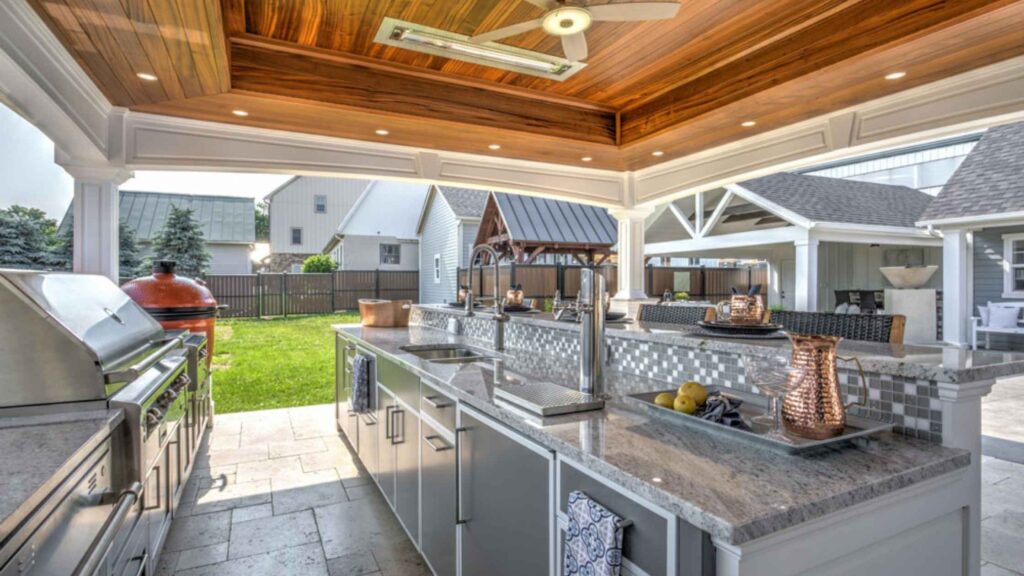
Imagine all the things you can use an outdoor kitchen island for! I am talking about a built-in BBQ, a mini fridge, extra counter space to lay out condiments, grilled onions, and charred veggies. Sorry, I am getting caught in my own daydream here, Haha.
Anyway, you get the point, and I am sure you have your own vision in mind already, so let's talk about how we can make your vision come true.
Design on a Dime: Planning Your Outdoor Kitchen Island Without Letting The Cost Get Out Of Control
Before you start hauling lumber or eyeing that mini-fridge, you need a vision and a plan that matches your budget. Think about how you’ll use the space. Is it just for grilling? Will you need prep surfaces, a sink, or even storage for drinks and utensils?
Grab a tape measure and sketch out your patio. Decide where utilities like water and electricity can go—or if you’ll go fully off-grid with a propane grill and a cooler.
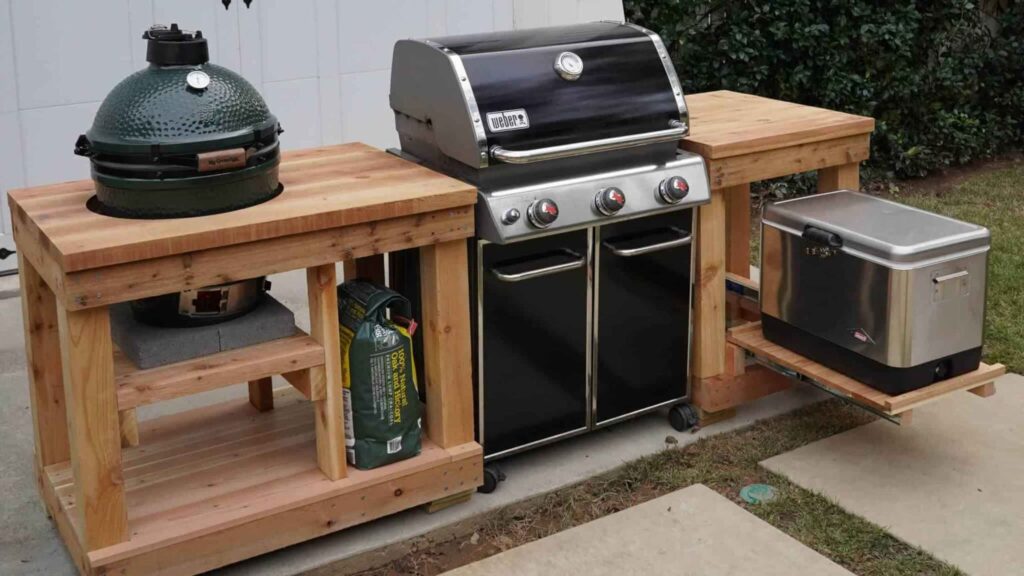
Modular layouts are the most affordable. Stick with straight-line or L-shaped designs, which are easy to build and don’t require tricky cuts. Also, make sure to position the island near your house or existing patio for convenience.
Planning ahead also means saving time, money, and frustration. So, grab a notebook and let your imagination grill.
Budget Brilliance: What Materials You Actually Need

Here's where the fun really begins. The key to an affordable outdoor kitchen island is knowing which materials give you the most bang for your buck.
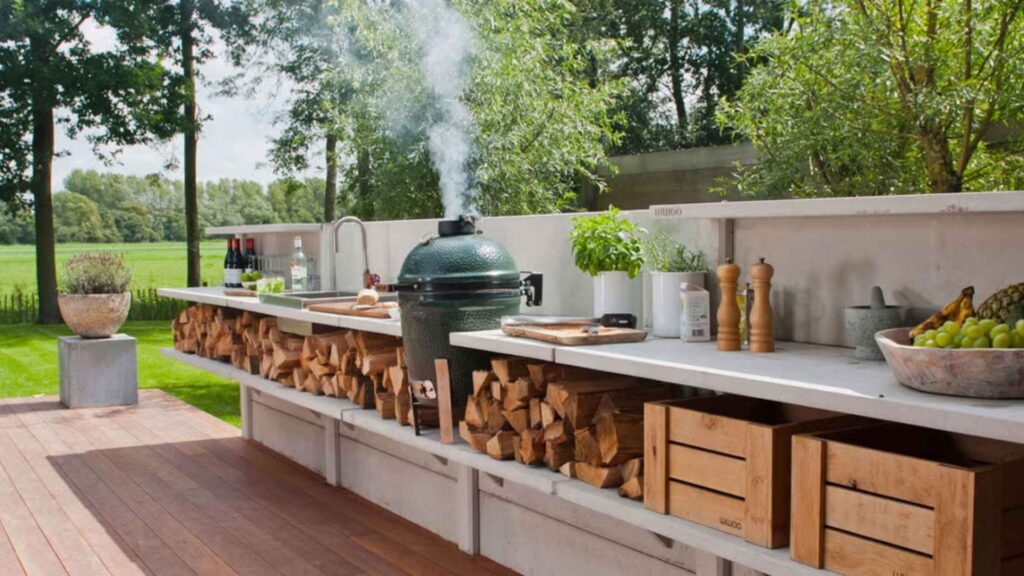
Skip expensive stone veneers and go for pressure-treated wood for the frame, it’s sturdy, weather-resistant, and wallet-friendly. Concrete backer board is another MVP, offering durability and heat resistance for your cooking zones.
For the countertop, poured concrete is an excellent DIY option that looks sleek and holds up against the elements. You can also repurpose old granite remnants or even install tile for a unique flair.
Keep an eye out for reclaimed wood or discounted patio pavers to give your island a stylish finish without emptying your wallet. And don’t forget the screws, brackets, and outdoor-safe sealants—they’ll hold everything together when the weather turns.
DIY Like a Pro: Step-by-Step Building Process for Beginners
You don’t need to be a carpenter to build a solid outdoor kitchen island. Start by creating a base frame out of pressure-treated 2x4s, built to match your island's layout. Anchor it securely to your patio or a concrete slab using masonry screws if needed.
Once the frame is secure, install concrete backer board around the outside to form your “walls.” Next, build out your grill or cooking surface frame. If you're adding a mini-fridge or cabinet space, leave gaps in the framing accordingly.
Install your countertop last—whether it’s concrete, tile, or granite. Finally, finish the outside with whatever aesthetic you prefer: stucco, tile, stone veneer, or even paint.
Every step might take a weekend, but seeing it all come together? That’s pure satisfaction—and way more affordable than calling in the pros.
DIY ideas are great for personal use, but you can even utilize them to learn skills that make money and start side hustles, too!
Affordable Upgrades That Look High End
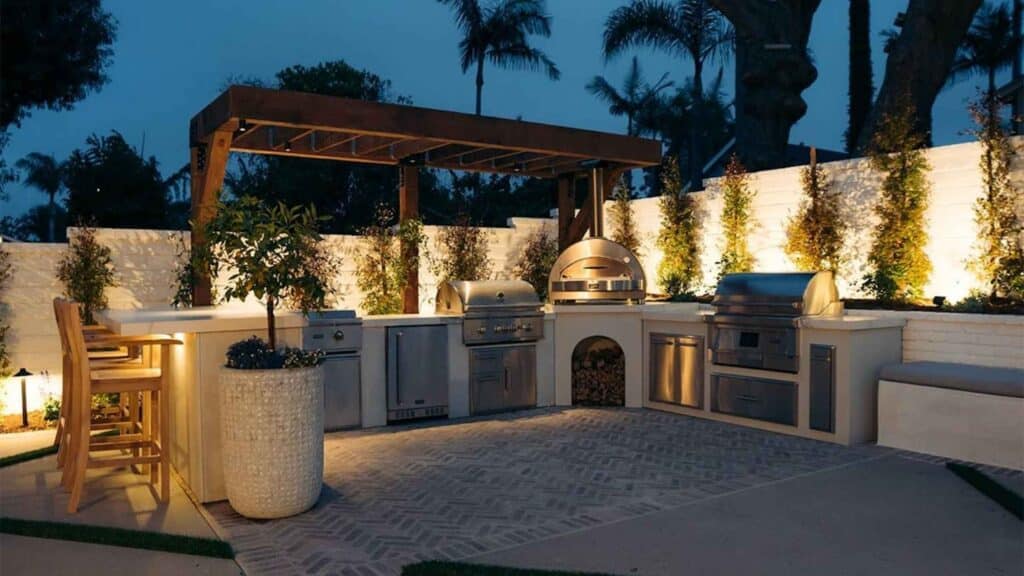
Just because you're building it on a budget doesn’t mean it has to look cheap. Add LED strip lighting underneath the countertop lip for a modern nighttime glow. Install hooks or a mounted magnetic strip for your grill tools.
You can even add a built-in ice bucket or a drink cooler into the countertop for added convenience. Look for deals on secondhand or outlet appliances like outdoor mini-fridges or used grills.
Many people sell gently used outdoor gear in great condition, especially during spring cleaning season. Add a simple bar overhang or seating area and suddenly, your DIY outdoor kitchen island feels like it belongs in a luxury magazine spread.
Style It Like a Designer: Details That Make a Big Difference
Once your outdoor kitchen island is built, it’s time to add the flair that transforms it from functional to phenomenal. Color matters so choose finishes that complement your backyard’s aesthetic.
A natural wood finish creates a rustic vibe, while crisp grays or sleek blacks feel modern and elevated. Add weatherproof bar stools or benches to create a place where guests will want to gather.
Backsplashes are another underrated detail. Peel-and-stick tile or faux brick panels are affordable, easy to install, and create a finished look that rivals designer builds.
If you're using a covered patio or pergola, hang some Edison bulbs or string lights overhead to boost ambiance. Even adding a few potted herbs like basil, rosemary, or mint nearby can bring both beauty and functionality to your space.
The more personal the space feels, the more you'll want to use it. Your outdoor kitchen should reflect your style, whether that's rugged and masculine, bright and beachy, or urban chic.
Avoid These Common Backyard Mistakes
Even the most enthusiastic DIYers can fall into a few common traps when building their own outdoor kitchen island. One major misstep is failing to weatherproof your materials. Always use treated wood, exterior-grade fasteners, and sealants.
Otherwise, your hard work could warp, rust, or rot in just one season. Another pitfall is overcomplicating the design. If you're not a builder by trade, stick to simple layouts and avoid fancy curves or custom cuts.
These not only increase build time but can also lead to structural issues if done incorrectly. And don’t underestimate airflow—grills need ventilation. Blocking off air vents or building a box too tightly around appliances can be a safety hazard.
Lastly, many people forget to factor in drainage and water run-off. Your island should either sit slightly elevated or be positioned where water doesn’t pool. Paying attention to the little things now saves you major repairs later.
DIY kitchen islands are just the beginning of what you can add to your summer bucket list this year!
Most Commonly Asked Questions Based on “Outdoor Kitchen Island”
What is the cheapest way to build an outdoor kitchen island?
The cheapest way to build an outdoor kitchen island is by using pressure-treated lumber for framing, concrete backer board for structure, and poured concrete or tile for countertops.
Skip plumbing and electricity unless absolutely necessary. Use a propane grill, repurposed furniture, or upcycled materials to cut costs even more.
Can I build an outdoor kitchen island on a wooden deck?
Yes, but with caution. You'll need to ensure your deck can support the weight of the island and grill. Use fireproof insulation and spacers to protect the wood beneath your cooking area.
Also, consider heat shields and ventilation. Avoid placing heavy concrete counters directly on a deck without reinforcement.
How do I protect my outdoor kitchen island from the weather?
Start by sealing every surface with outdoor-safe sealant, especially wood and concrete. Use stainless steel hardware and outdoor-rated finishes.
Add a grill cover and, if possible, a canopy or pergola to block direct rain and sun exposure. During the off-season, use waterproof covers or even move smaller appliances indoors.
Do I need a permit to build an outdoor kitchen island?
In most cases, a simple DIY outdoor kitchen island without plumbing or electricity doesn’t require a permit. But if you plan to hardwire lighting, add a sink, or connect gas lines, check with your local building department. It’s always better to double-check codes before building.
How long does it take to build an outdoor kitchen island?
With a solid plan and all your materials ready, you can complete a basic build in a weekend or two. More complex designs that include countertops, finishes, and built-in appliances might take several weekends. The more detailed your prep work, the faster the actual build will go.
If you want to take the DIY kitchen ideas inside, check out 12 Jaw-Dropping DIY Kitchen Ideas You Can Actually Do Yourself.
Your Backyard Empire Starts Here
Creating your own outdoor kitchen island is one of the most satisfying and budget-friendly upgrades you can make to your outdoor space.
It's not just about grilling burgers, it’s about crafting a space where memories are made, friends gather, and your backyard becomes your favorite room of the house.
With the right planning, smart materials, and a dash of creativity, you can build something beautiful without spending a fortune.
And every time you fire up the grill or serve a cocktail from your DIY countertop, you’ll feel that deep sense of pride that comes from doing it yourself.
So go ahead,sketch that dream, roll up your sleeves, and get building. Your perfect outdoor escape is just a few weekends away.